How to set up cash on delivery checkout in StoreOS
Cash on delivery online store setup in Bangladesh: use the StoreOS Order flow page to set COD as default, pick checkout fields, and see what needs a paid plan.
Most customers in Bangladesh still want to pay when the parcel arrives, so cash on delivery online store setup is the first checkout job for almost every seller. If you are curious why, read why cash on delivery is still winning in Bangladesh.
In StoreOS, the settings for this live on one page called Order flow. Its subtitle says it covers "checkout payments, guest access, required fields, delivery, and order SMS." This guide goes through that page from top to bottom with real console screenshots, and it is upfront about what you cannot switch on without a paid plan.
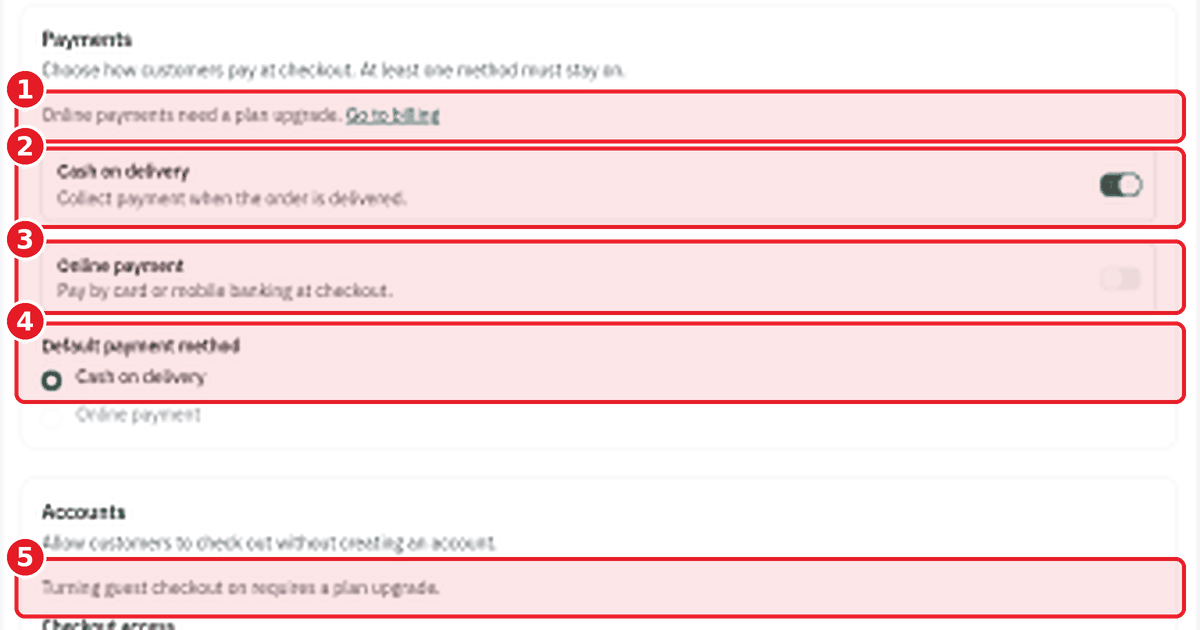
The screenshots come from a sample store called Rangdhonu Crafts on the Free plan. Some screenshots on this page are lower resolution than we would like.
Before you start
- Create your store at StoreOS signup if you have not already.
- Decide what you want customers to type at checkout. Keep it to what you need to deliver.
- Set your delivery fees first: how to set delivery charges by region in StoreOS.
Step 1: Open the Order flow page
In the console, open Online Store and then Order flow. The breadcrumb reads Dashboard, Online Store, Order flow. The page is split into sections: Payments, Accounts, Checkout fields, Delivery regions and Notifications. A Save button sits at the bottom.
Step 2: Check the Payments section
The first section is Payments. It says: "Choose how customers pay at checkout. At least one method must stay on."
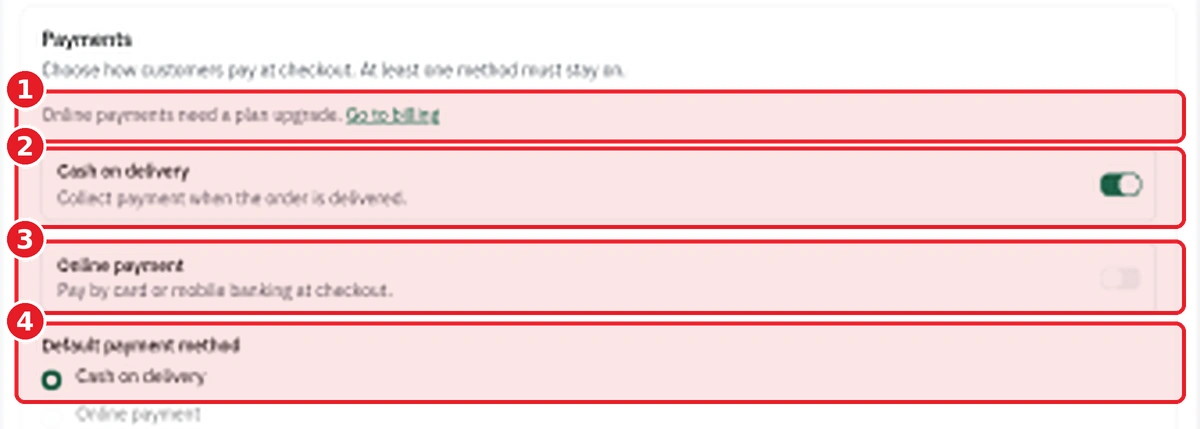
- A notice reads "Online payments need a plan upgrade," with a Go to billing link.
- Cash on delivery is switched on. Its description is "Collect payment when the order is delivered."
- Online payment is switched off. Its description is "Pay by card or mobile banking at checkout."
- Under Default payment method, Cash on delivery is the selected option.
So in this store, cash on delivery is on and is the default. Since at least one method must stay on, COD is the method in use here.
A note on plans. The console is clear that online payments need a plan upgrade. Our own pricing page lists what each plan includes, and the same goes for taking COD orders on a live store, so check pricing before you go live. If you want card or mobile banking later, read payment gateways for an online store in Bangladesh.
Step 3: Understand the Accounts section
Next is Accounts, which controls how customers get to checkout.
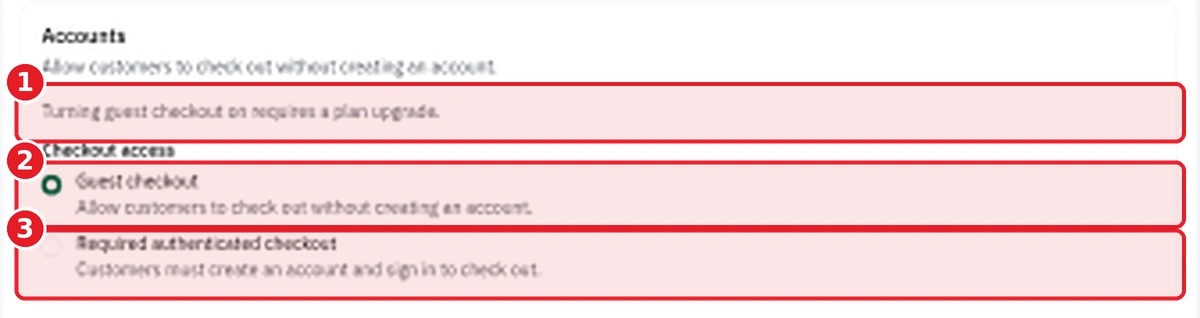
- The note says "Turning guest checkout on requires a plan upgrade."
- Guest checkout lets customers check out without creating an account.
- Required authenticated checkout means customers must create an account and sign in to check out.
In the sample store, Guest checkout is the option shown as selected. Because the console says turning it on needs a plan upgrade, treat guest checkout as a paid-plan feature and confirm it on the pricing page before you rely on it. For more on why sellers want it, see phone OTP and guest checkout in Bangladesh.
Step 4: Choose your checkout fields
The Checkout fields section says: "Name and phone are always required. Configure other fields here, or add custom ones for the same checkout form." Each field has three choices: Required, Optional and Hidden.
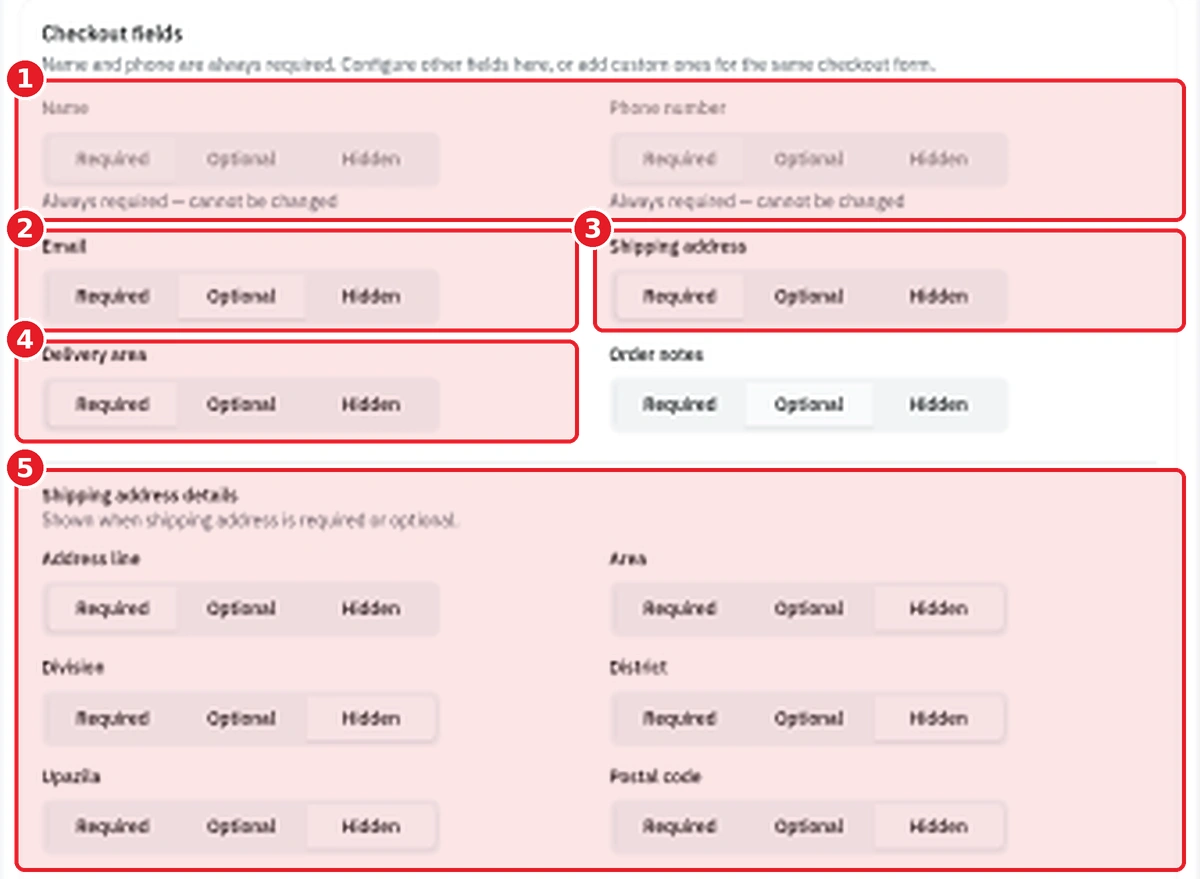
- Name and Phone number are marked "Always required, cannot be changed."
- Email is set to Optional in the sample store.
- Shipping address is set to Required.
- Delivery area is set to Required. Your regions and fees live in the Delivery regions section below.
- Shipping address details lists Address line, Area, Division, District and Upazila as Required, and Postal code as Optional. The section note says it is shown when the shipping address is required or optional.
Order notes is also on the page, set to Optional. Below the address details there is a Custom fields area with an Add field button. In the sample store it says no custom fields are configured.
For cash on delivery, the phone number matters most. It is how you and the courier reach the customer, and how you can confirm a doubtful order. How to reduce fake orders on COD in Bangladesh explains why.
Step 5: Check the delivery regions
The Delivery regions section on this page lists the same regions and fees as the Charges page: Dhaka 70, Chattogram 100, Rangpur 125, and Tk 110 for Sylhet, Rajshahi, Khulna, Barishal and Mymensingh. It repeats the note that customers pick a region at checkout and are charged its rate, and has its own Add region button.
If you want to change a fee, our delivery charges guide covers it.
Step 6: Look at order notifications
The last section is Notifications. It says order and shipment alerts use your messaging integrations, and shows a row reading "SMS on order placed" with the note "Managed from the Notifications settings." A Notifications button sits at the right of that row.
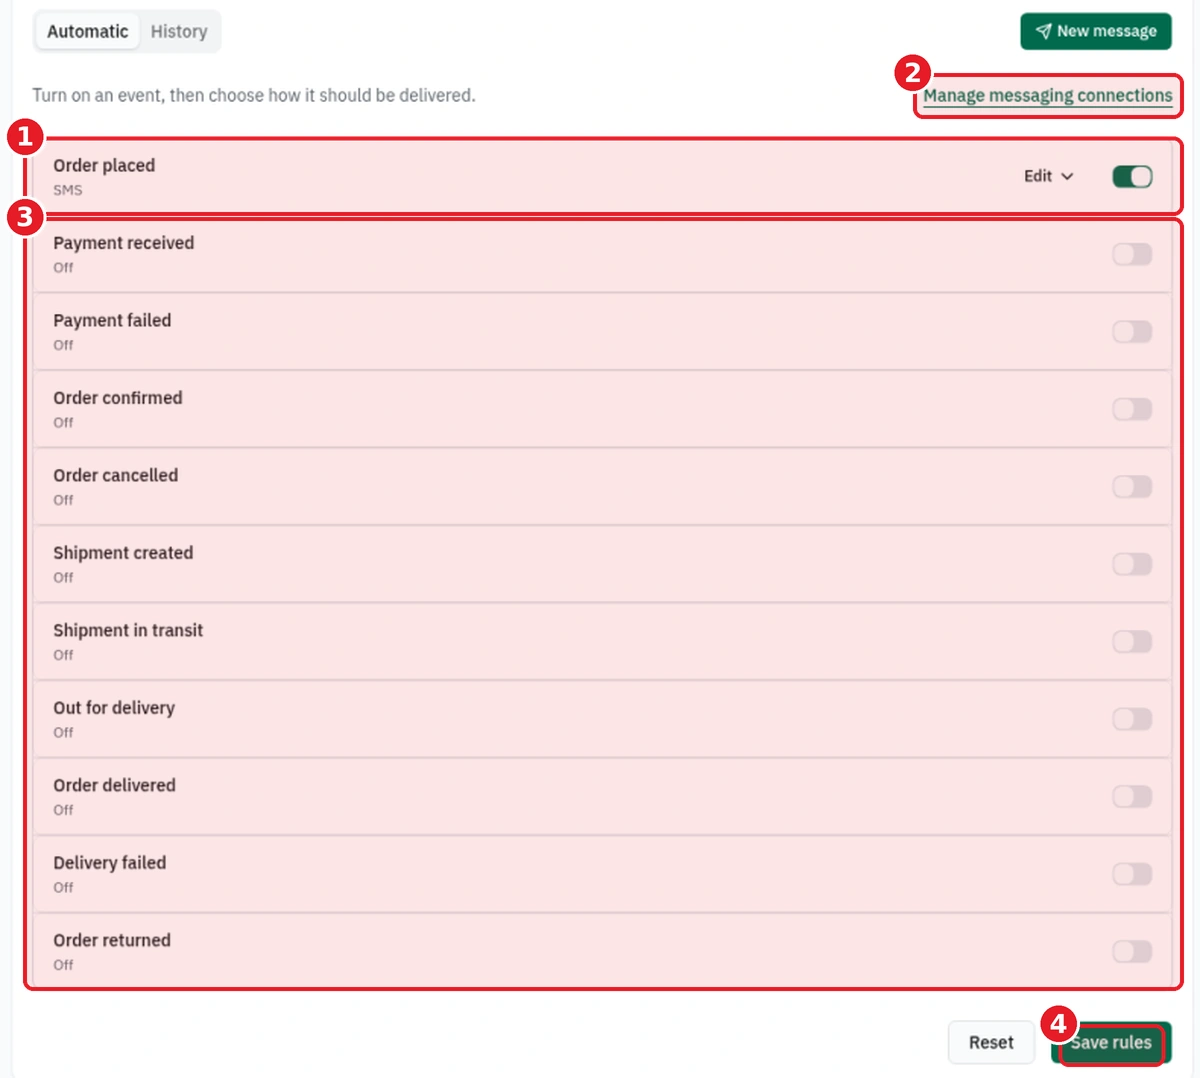
- Order placed is switched on and shows SMS.
- Manage messaging connections is a link at the top right of the list.
- Every other event, from Payment received to Order returned, is switched off in the sample store.
- Save rules is at the bottom right, next to Reset.
Step 7: Click Save
Back on the Order flow page, click Save at the bottom when you are happy with your choices. On the notifications page, use Save rules.
Step 8: Place a test order
Open your storefront, add a product, and walk through checkout the way a customer would. Check that cash on delivery is offered, that the fields match what you chose, and that the delivery fee matches the region you pick. For the courier step after that, see booking Pathao and Steadfast from your orders.
FAQ
Is cash on delivery on by default in StoreOS?
In the sample store we used, the Cash on delivery toggle is on and is the default payment method. Check your own Order flow page to confirm.
Can I turn on online payments?
The console says online payments need a plan upgrade and links to billing. Until then, the Online payment toggle stays off.
Can customers check out without an account?
The Accounts section offers Guest checkout, and it says turning guest checkout on requires a plan upgrade.
Which checkout fields can I change?
Name and phone are always required. Email, shipping address, delivery area and order notes can be set to Required, Optional or Hidden, and you can add custom fields.
Where do I change delivery fees?
On the Charges page, or in the Delivery regions section of Order flow. See the delivery charges guide.
Next step
Create a free store, open Order flow, and run a test order today. See pricing for what each plan includes.
Related reading
- How to manage stock in StoreOS: on hand, available and low stockStock management for an online store in Bangladesh: read the StoreOS Stock page, tell on h…
- How to set delivery charges by region in StoreOSDelivery charge setup for an online store in Bangladesh: add Dhaka and outside-Dhaka regio…
- Best ecommerce platform in Bangladesh: how to chooseChoosing the best ecommerce platform in Bangladesh? Use this 12-point checklist: COD, cour…