

Set up Meta Pixel
Connect Facebook / Meta Pixel to your StoreOS shop so ads can measure visits, carts, and sales.
What this is for
Meta Pixel (Facebook Pixel) helps Facebook and Instagram ads measure what customers do on your shop — page views, product views, add to cart, checkout, and purchases.
On StoreOS you connect the pixel once in Plugins. StoreOS then sends the usual shopping events automatically. Events go from the customer’s browser and from StoreOS’s servers, so measurement still works when browsers or ad blockers block the pixel.
You do not paste tracking code into your theme.
Before you start
You need:
- A Meta Business account with access to Events Manager
- Access to your store in the StoreOS console (Plugins)
About 10–15 minutes.
Step 1 — Get your Pixel ID
- Open Meta Events Manager.
- Choose your business.
- Open an existing Pixel (Dataset), or create a new one.
- Copy the Pixel ID / Dataset ID (a long number under the Pixel name).
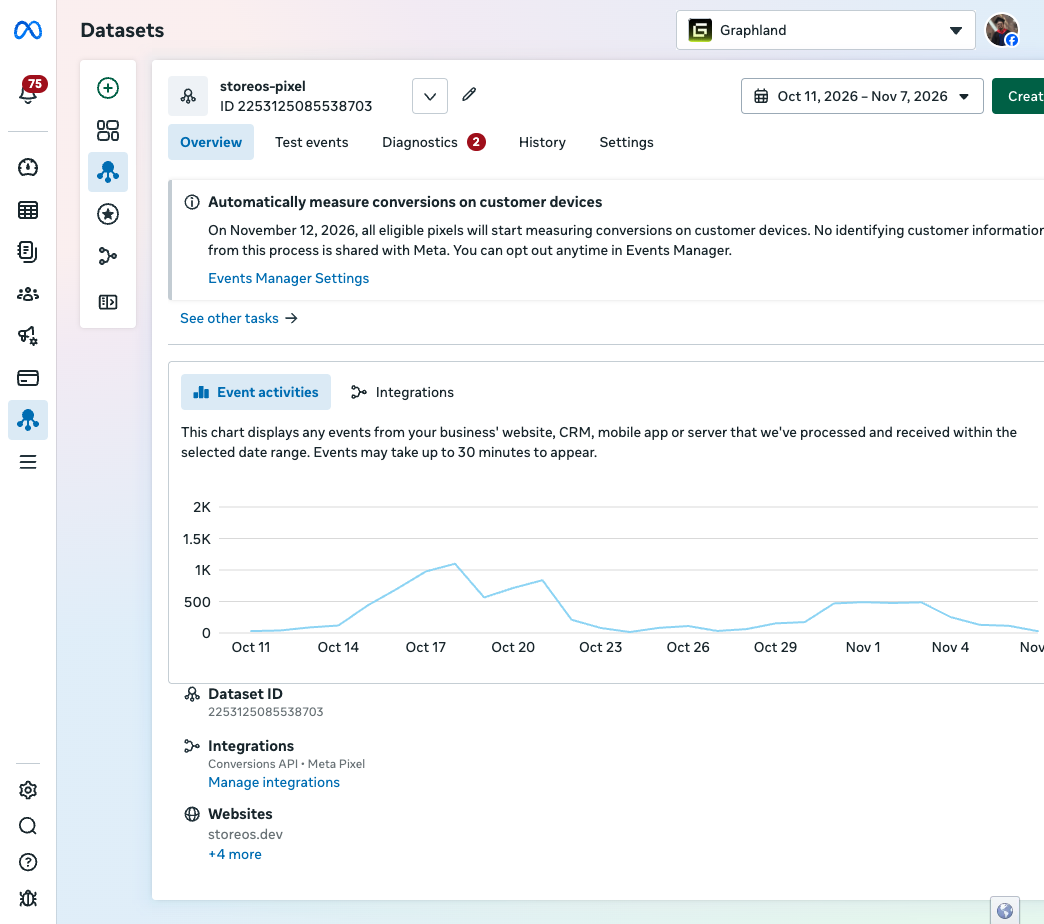
Keep Events Manager open for the next steps.
Step 2 — Get a Conversions API access token
This lets StoreOS send events from our servers. We recommend it for reliable ads measurement.
- In Events Manager, open your Pixel.
- Go to Settings.
- Scroll to Conversions API → Set up direct integration.
- Click Generate access token.
- Copy the token and keep it private (like a password).
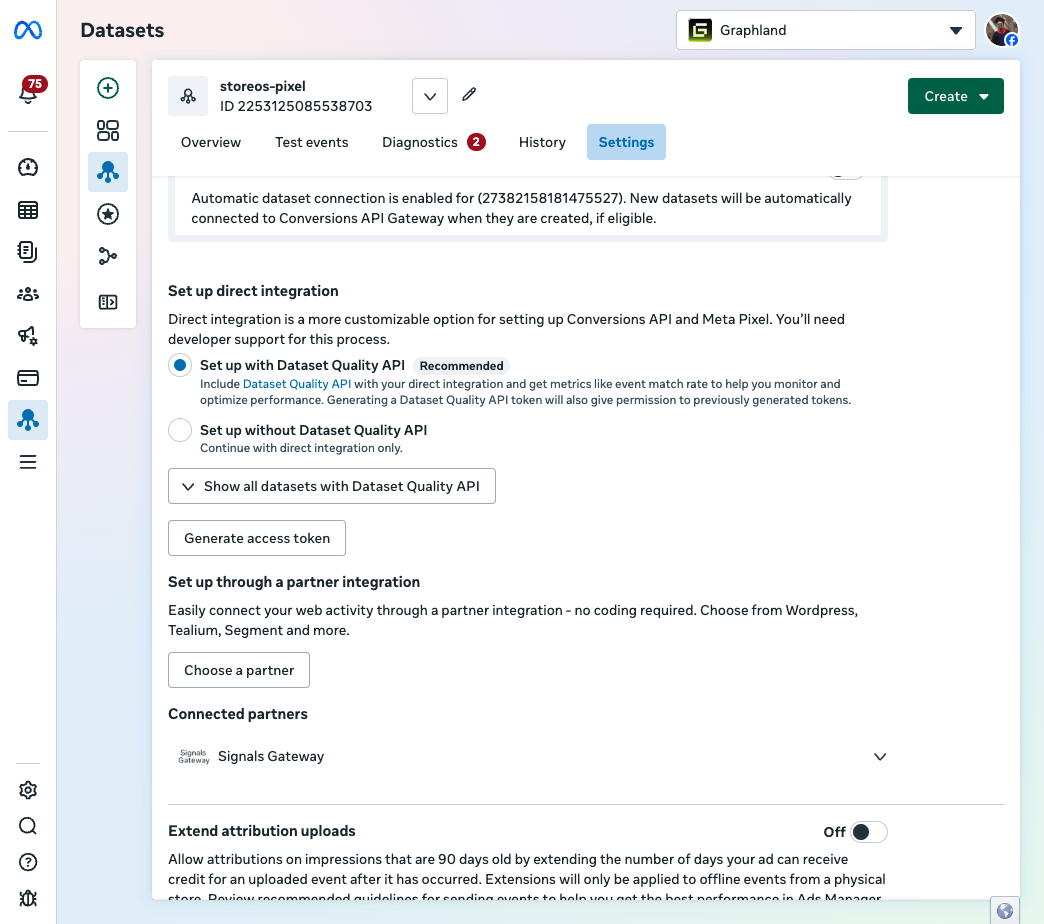
If you skip this step, browser tracking can still work, but many events may never reach Meta when customers use ad blockers.
Step 3 — Connect Pixel in StoreOS
- Sign in to the StoreOS console for your store.
- Open Plugins.
- Open Facebook / Meta Pixel.
- Paste:
- Pixel ID (required)
- Conversions API access token (recommended)
- Save or install the plugin.
Open your live shop and refresh the homepage once so the pixel can load.
Step 4 — Test that events arrive
Do this before spending on ads.
Open Test events (Website)
- In Events Manager, open your Pixel → Test events.
- Choose channel Website.
- Optionally enter your shop URL and click Test Events, then keep the Test events tab open while you browse the shop.
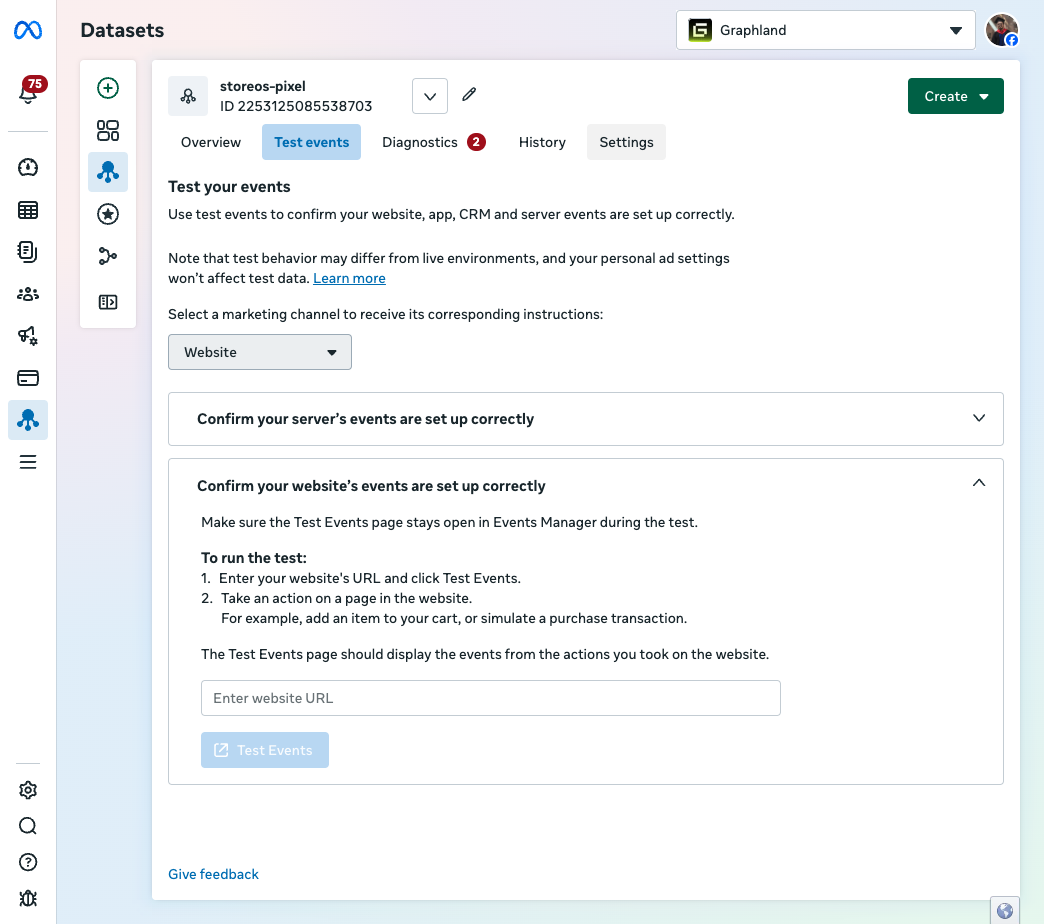
If Meta shows a Test event code, paste it into StoreOS → Plugins → Facebook / Meta Pixel → Test event code and save. That helps Server rows appear on the Test events tab. Clear it when you finish testing.
Walk through the shop
With Test events open, visit your shop (turn off ad blockers, or use a private window without extensions):
- Homepage → PageView
- Open a product → View content
- Add to cart → Add to cart
- Search for a product → Search
- Go to checkout → Initiate checkout
- Place a cash-on-delivery order → Purchase on the thank-you page
What success looks like
In Test events you should see those event names, marked processed. With an access token (and test code while testing), you should also see Server as well as Browser.
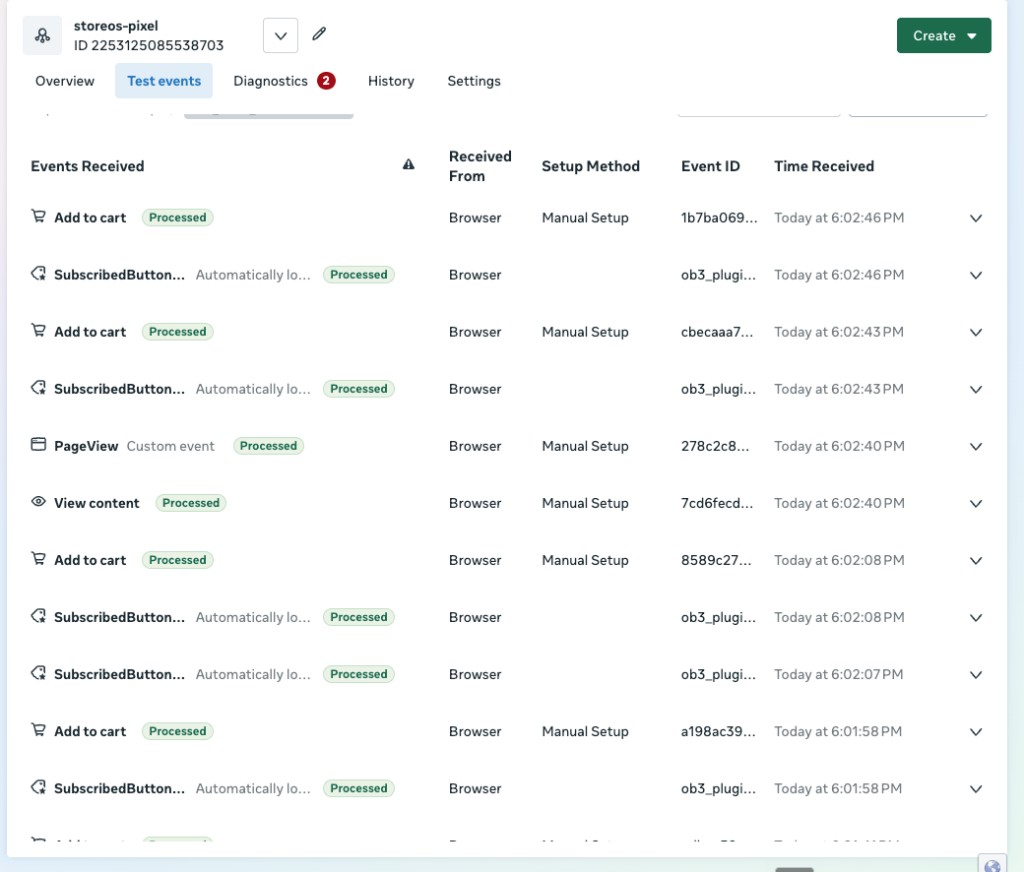
What gets tracked
| What the customer does | Event Meta sees |
|---|---|
| Opens a page in your shop | PageView |
| Views a product | View content |
| Searches | Search |
| Adds something to the cart | Add to cart |
| Adds to wishlist (if your theme has wishlist) | Add to wishlist |
| Opens checkout | Initiate checkout |
| Submits the order | Add payment info |
| Completes the order | Purchase |
| Creates an account / becomes a customer | Complete registration |
Common problems
Nothing shows in Test events
Check the Pixel ID is saved, you are testing the same Pixel in Events Manager, and ad blockers are off. Keep the Test events tab open while you click around the shop.
Only “Browser”, no “Server”
Add or re-paste the Conversions API access token. While testing, also paste Meta’s Test event code into StoreOS if Events Manager shows one.
Shop works but Meta shows nothing
Tracking never blocks checkout. Fix the fields in Plugins, save again, then place a test order.
Finished testing
Remove the test event code in StoreOS so everyday traffic is not marked as test.
Privacy note
- The Pixel ID appears in your public shop page — that is normal.
- The access token stays on StoreOS servers. Do not share it in chat, themes, or public posts.